If you want to add your own custom attributes according to your Magento 2 store requirements, you need to create a custom module. After creating the custom module, you must add the AddCustomerAttributes.php file inside the app/code/Vendor/Module/Setup/Patch/Data/ directory. Here you can see the following steps that will help you to create a custom attribute in Magento 2 for customers.
First of all, we will create a custom module Such as creating a vendor name “Webiators” and the Module name is “CustomerAttribute”
Step-1: Create a module.xml in app/code/Webiators/CustomerAttribute/etc/module.xml and add the code given below:
|
1 2 3 4 5 |
<?xml version="1.0" ?> <config xmlns:xsi="http://www.w3.org/2001/XMLSchema-instance" xsi:noNamespaceSchemaLocation="urn:magento:framework:Module/etc/module.xsd"> <module name="Webiators_CustomerAttribute" setup_version="1.0.0"/> </config> |
Step-2: Create a registration.php in app/code/Webiators/CustomerAttribute/registration.php and add the code given below:
|
1 2 3 4 5 6 7 8 |
<?php \Magento\Framework\Component\ComponentRegistrar::register( \Magento\Framework\Component\ComponentRegistrar::MODULE, 'Webiators_CustomerAttribute', __DIR__ ); |
Step-3: Create a AddCustomerAttributes.php file inside app/code/Vendor/CustomModule/Setup/Patch/Data/ directory. and add the code given below:
|
1 2 3 4 5 6 7 8 9 10 11 12 13 14 15 16 17 18 19 20 21 22 23 24 25 26 27 28 29 30 31 32 33 34 35 36 37 38 39 40 41 42 43 44 45 46 47 48 49 50 51 52 53 54 55 56 57 58 59 60 61 62 63 64 65 66 67 68 69 70 71 72 73 74 75 76 77 78 79 80 81 82 83 84 85 86 87 88 89 90 91 92 93 94 95 96 97 98 99 100 101 102 103 104 105 106 107 108 109 110 111 112 113 114 115 116 |
<?php declare(strict_types=1); namespace Webiators\CustomerAttribute\Setup\Patch\Data; use Exception; use Psr\Log\LoggerInterface; use Magento\Customer\Api\CustomerMetadataInterface; use Magento\Customer\Model\ResourceModel\Attribute as AttributeResource; use Magento\Customer\Setup\CustomerSetup; use Magento\Customer\Setup\CustomerSetupFactory; use Magento\Framework\Setup\ModuleDataSetupInterface; use Magento\Framework\Setup\Patch\DataPatchInterface; class AddCustomerAttributes implements DataPatchInterface { /** * @var ModuleDataSetupInterface */ private $moduleDataSetup; /** * @var CustomerSetup */ private $customerSetup; /** * @var AttributeResource */ private $attributeResource; /** * @var LoggerInterface */ private $logger; /** * Constructor * * @param ModuleDataSetupInterface $moduleDataSetup * @param CustomerSetupFactory $customerSetupFactory * @param AttributeResource $attributeResource * @param LoggerInterface $logger */ public function __construct( ModuleDataSetupInterface $moduleDataSetup, CustomerSetupFactory $customerSetupFactory, AttributeResource $attributeResource, LoggerInterface $logger ) { $this->moduleDataSetup = $moduleDataSetup; $this->customerSetup = $customerSetupFactory->create(['setup' => $moduleDataSetup]); $this->attributeResource = $attributeResource; $this->logger = $logger; } public static function getDependencies(): array { return []; } public function getAliases(): array { return []; } public function apply() { // Start setup $this->moduleDataSetup->getConnection()->startSetup(); try { // Add customer attribute with settings $this->customerSetup->addAttribute( CustomerMetadataInterface::ENTITY_TYPE_CUSTOMER, 'telephone', [ 'label' => 'Telephone', 'required' => 1, 'position' => 100, 'system' => 0, 'user_defined' => 1, 'is_used_in_grid' => 1, 'is_visible_in_grid' => 1, 'is_filterable_in_grid' => 1, 'is_searchable_in_grid' => 1, ] ); // Add attribute to default attribute set and group $this->customerSetup->addAttributeToSet( CustomerMetadataInterface::ENTITY_TYPE_CUSTOMER, CustomerMetadataInterface::ATTRIBUTE_SET_ID_CUSTOMER, null, 'telephone' ); // Get the newly created attribute's model $attribute = $this->customerSetup->getEavConfig() ->getAttribute(CustomerMetadataInterface::ENTITY_TYPE_CUSTOMER, 'telephone'); // Make attribute visible in Admin customer form $attribute->setData('used_in_forms', [ 'adminhtml_customer' ]); // Save attribute using its resource model $this->attributeResource->save($attribute); } catch (Exception $e) { $this->logger->err($e->getMessage()); } // End setup $this->moduleDataSetup->getConnection()->endSetup(); } } |
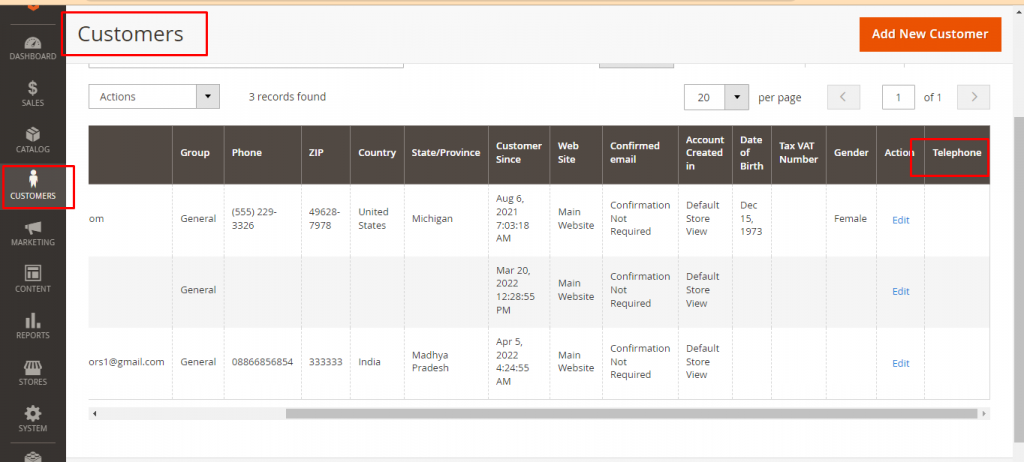
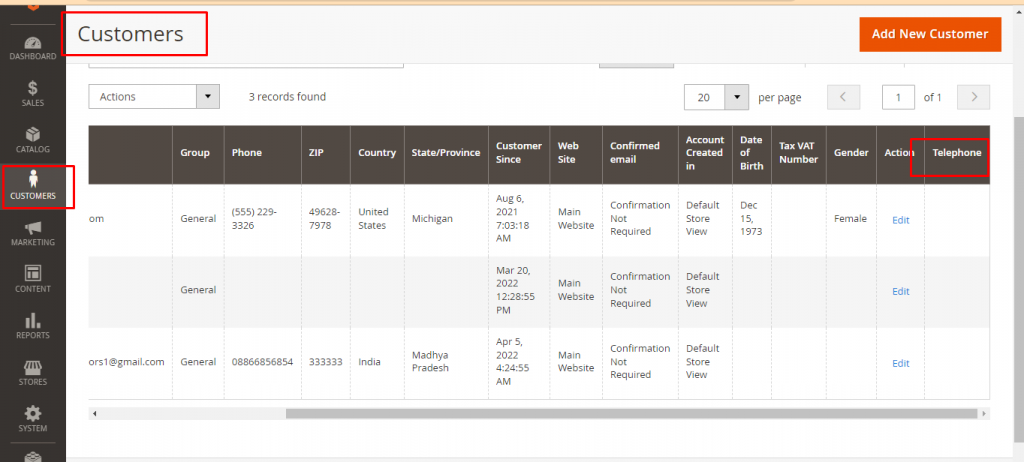
Now Go to the Magento 2 Store admin > Customer and you will see the custom attribute in Magento 2 store that you have created by using Data Patch.


Hope this blog post is very helpful for you to create Magento 2 customer attributes. If you have any query or issue related to this post and your Magento 2 Store, You can Contact Us.
Thank You! 🙂
Read More


