What is Controller?
Controller is a class located in module Controller folder, responsible for specific Url or group of Url’s.
Controller has one or more files in Controller folder of module in Magento 2 , it includes actions of class which contain execute() method. There are 2 different controllers, they are frontend controller and backend controller. They are generally similar of workflow, but admin controller has additional methods for permission checks.
Works of Controller?
It receive an request from end-user (browser or comamnd line), for example:
1 | http://example.com/route_name/controller/action |
route_name is a unique name which is set in routes.xml.
controller is the folder inside Controller folder.
action is a class with execute method to process request.
Create a Controller
To create a custom controller, we need to go through these steps:
For example, we create a index controller and a index action for module Webiators_HelloMagento:
Step 1: Create routes.xml file.
1 | File: app/code/Webiators/HelloMagento/etc/frontend/routes.xml |
1 2 3 4 5 6 7 8 | <?xml version="1.0" ?> <config xmlns:xsi="http://www.w3.org/2001/XMLSchema-instance" xsi:noNamespaceSchemaLocation="urn:magento:framework:App/etc/routes.xsd"> <router id="standard"> <route frontName="hellomagento" id="hellomagento"> <module name="Webiators_HelloMagento"/> </route> </router> </config> |
In our previous blog we discussed about Creating Module in Magento 2 , we created file routes.xml. If you already created this file, you can ignore this step.
Step 2: Create controller file
1 | File: app/code/Webiators/HelloMagento/Controller/Index/Index.php |
1 2 3 4 5 6 7 8 9 10 11 12 13 14 15 16 17 18 19 20 | <?php namespace Webiators\HelloMagento\Controller\Index; class Index extends \Magento\Framework\App\Action\Action { protected $_pageFactory; public function __construct( \Magento\Framework\App\Action\Context $context, \Magento\Framework\View\Result\PageFactory $pageFactory) { $this->_pageFactory = $pageFactory; return parent::__construct($context); } public function execute() { return $this->_pageFactory->create(); } } |
Step 3: Create Layout file
1 | File: app/code/Webiators/HelloMagento/view/frontend/layout/hellomagento_index_index.xml |
1 2 3 4 5 6 | <?xml version="1.0"?> <page xmlns:xsi="http://www.w3.org/2001/XMLSchema-instance" layout="1column" xsi:noNamespaceSchemaLocation="urn:magento:framework:View/Layout/etc/page_configuration.xsd"> <referenceContainer name="content"> <block class="Webiators\HelloMagento\Block\Index" name="hellomagento_index_index" template="Webiators_HelloMagento::index.phtml" /> </referenceContainer> </page> |
Step 4: Create Block file
1 | File: app/code/Webiators/HelloMagento/Block/Index.php |
1 2 3 4 5 6 | <?php namespace Webiators\HelloMagento\Block; class Index extends \Magento\Framework\View\Element\Template { } |
Step 5: Create template file
1 | File: app/code/Webiators/HelloMagento/view/frontend/templates/index.phtml |
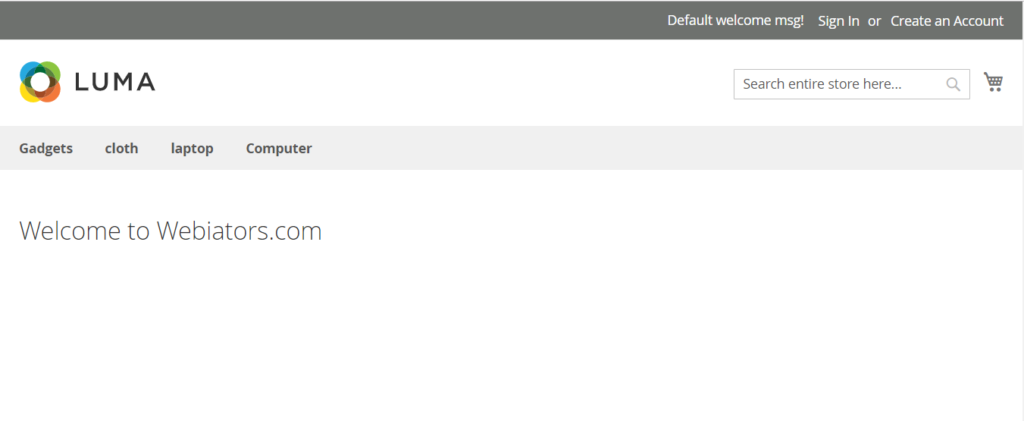
1 | <h2>Welcome to Webiators.com</h2> |
You can learn more about View: Layout, Block, Template in our previous blog.
Step 6: Flush Magento cache using this command
1 | php bin/magento cache:flush |
Step 7: Run
Let’s open browser and navigate to
1 2 3 | http://<yourhost.com>/hellomagento/index/index or http://<yourhost.com>/hellomagento/ |

I tried to present an easy way for the task and hope it helps. Please comment below if any problem is faced while implementing the above steps.

